

So I wrote an Instagram Filter Pt.1
So I wrote an Instagram Filter Pt.1
Ordered Dithering Implementation in Spark Shading Language

Brief

In the first part of this article, I will have a brief introduction on TechYouth Incubator, the story behind the filter and what is dithering.
In the second part of this article, I will include a brief guide and materials in writing your own shader in Meta Spark, along with the source code of my implementation.
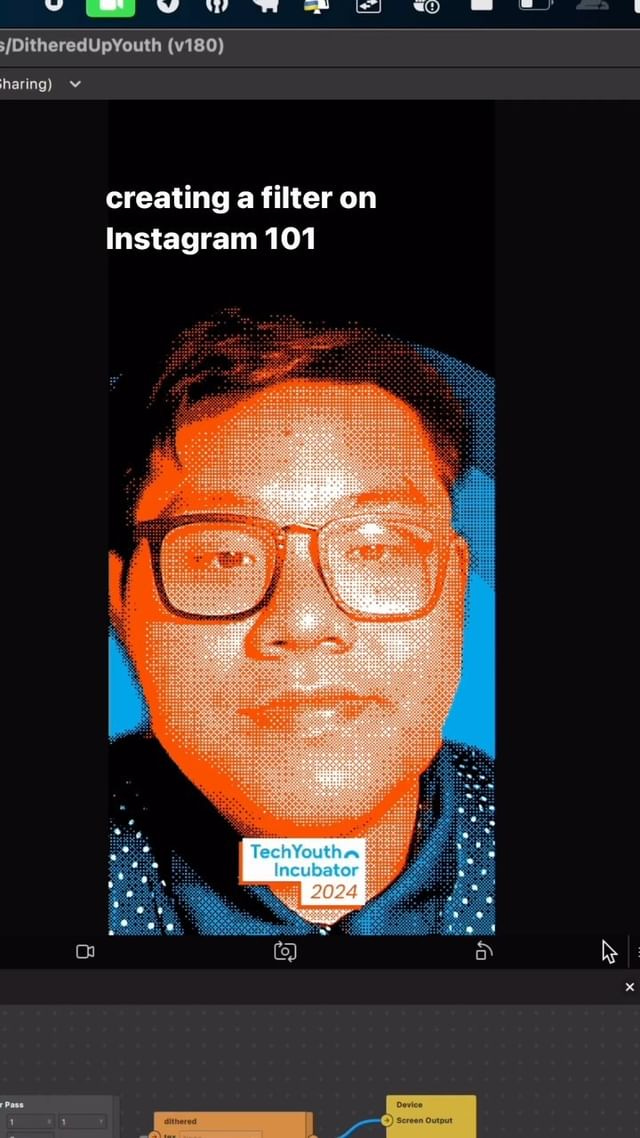
The filter can be tested here. I also made an Instagram Reel to explain the whole thing in 1 minute:
The story behind

Outside of my casual 9-5, I’m also the Talent Acquisition Lead at Tech Youth Incubator, an incubator organized by the largest student-based startup ecosystem in Viet Nam.
When you hear about Talent Acquisition, you would think about finding talents through outbound channels such as active scouting. However, we also focus on inbound channels with campaigns on social media.
As part of building an effective inbound channel for Tech Youth, my team got to work on the designs of the website, including the elements on it. This consists of devising an aesthetic approach to process images on the website:

To make this happen, the process was very manual. I had to clip the background, replaced it with a custom background then pass the whole image through a Dithering algorithm.

At the same time, I was trying to find new creative ways to spread the presence of TechYouth Incubator with my team… Then it happened to me:
“What if I could make the stylized image generation process automated and accessible for everyone?” - My Eureka Moment
And what better way to do that than making an Instagram Filter.
What’s dithering btw
If you read about Dithering on Wikipedia, you’ll come across a definition like this
“Dither is an intentionally applied form of noise used to randomize quantization error, preventing large-scale patterns such as color banding in images.”
In basic term, dithering is what makes your image looks good even with limited colors. For example, this is a 512x512 in three scenarios: full color, black and white with no dithering, black and white with dithering.

The dithered image doesn’t have more color. In fact, it only uses two colors, black and white, but it gives you the illusion of depth by mixing a bunch of black and white to generate the perceived gray color.
You can think of this as mixing paint. You can watch Ordered Dithering by Computerphile on Youtube for the best visual explanation on this.
In the example above, I employed a method called Error Diffusion dithering, which is also covered by Computerphile here.
Why dithering?
Dithering is incredibly important, especially at the early age of computers. For example, when the Apple II was released, it can only show 16 colors.

To display a full color image like below to a 16 color one is a hard task. In fact, you can look at the example below to get an essence of what images would look like on an Apple II with and without dithering.

The dithered image still looks bad, but it’s much better than the one without. And most important of all, in 1977, the dithered image looks hecka good.
Another apparent advantage of dithering is size reduction. For the above example, the normal photo takes ~500kB while the dithered only takes ~50kB. The reason behind this is obvious as well: each pixel only has to store 16 values (4 bit) instead of 16 million values (24 bit - 8 bit for each channel).
Fun fact: The Macintosh has its own dithering algorithm developed by Bill Atkinson called Atkinson Dithering.
How to implement dithering
There are multiple image dithering methods. In the previous examples, we have come across:
It can be intimidating to look at the math behind dithering, but it is actually very simple.
In addition to viewing the materials I’ve given in the above sections, I also recommend reading the following:
TechYouth Dithered

The TechYouth Dithered is an implementation of Ordered Dithering with a reduced Apple II color palette. As shown above, you can see that the palette has 4 colors: white, orange, black, cyan.
Continue reading Pt. 2
This article is a long-format article, targeting people who like to go down the rabbit hole. Each orange link I included above is highly recommended if you’re curious. Each section finished means you’re closer to the endless bottom.
The implementation in Meta Spark including source code is written in Part 2 of the article.