


So I wrote an Instagram Filter Pt.2
Ordered Dithering Implementation in Spark Shading Language

Brief

In the first part of this article, I will have a brief introduction on TechYouth Incubator, the story behind the filter and what is dithering.
In the second part of this article, I will include a brief guide and materials in writing your own shader in Meta Spark, along with the source code of my implementation.
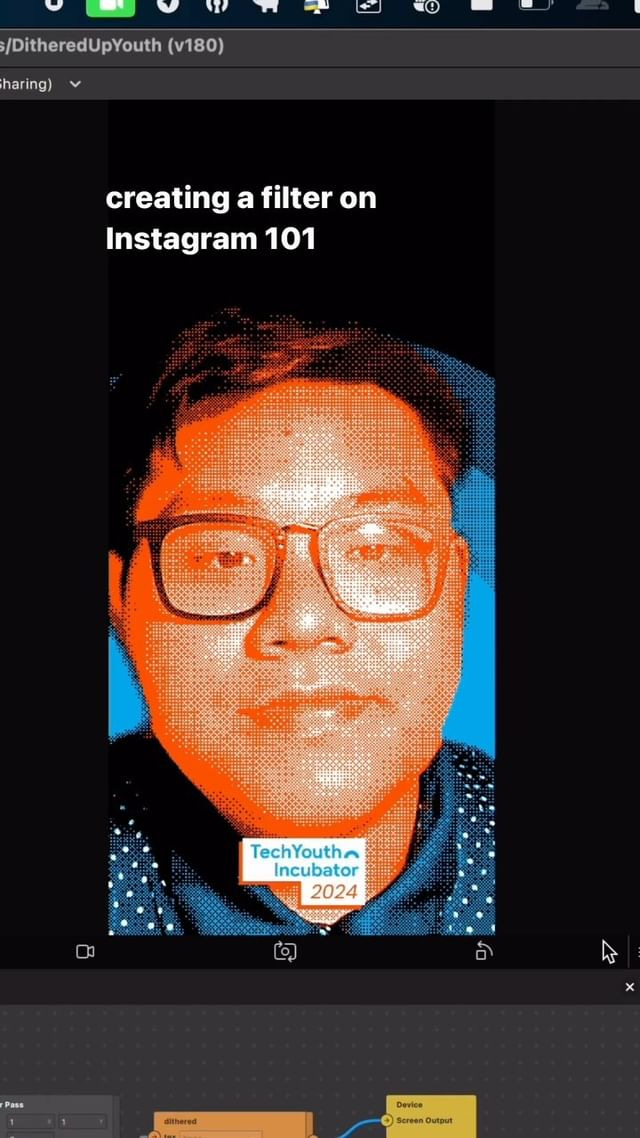
The filter can be tested here. I also made an Instagram Reel to explain the whole thing in 1 minute:
Building a filter for Instagram
Meta has their own software suite for building immersive experience for products in their ecosystem. This suite is Meta Spark, a product developed by Reality Labs.
Using Spark, you can make Instagram Filters, AR Experience and more. For learning Spark, I recommend using their own Learning platform here. Spark has a huge library of examples and tutorials for you to test.
Methods
To build an experience in Spark, there are 3 ways:
With Scene, Layers and Objects: This method would relate the most to creatives. To design an experience on Spark, you only need to know about assets, drag and drop them to the workspace and use pre-defined filters. This is limiting.
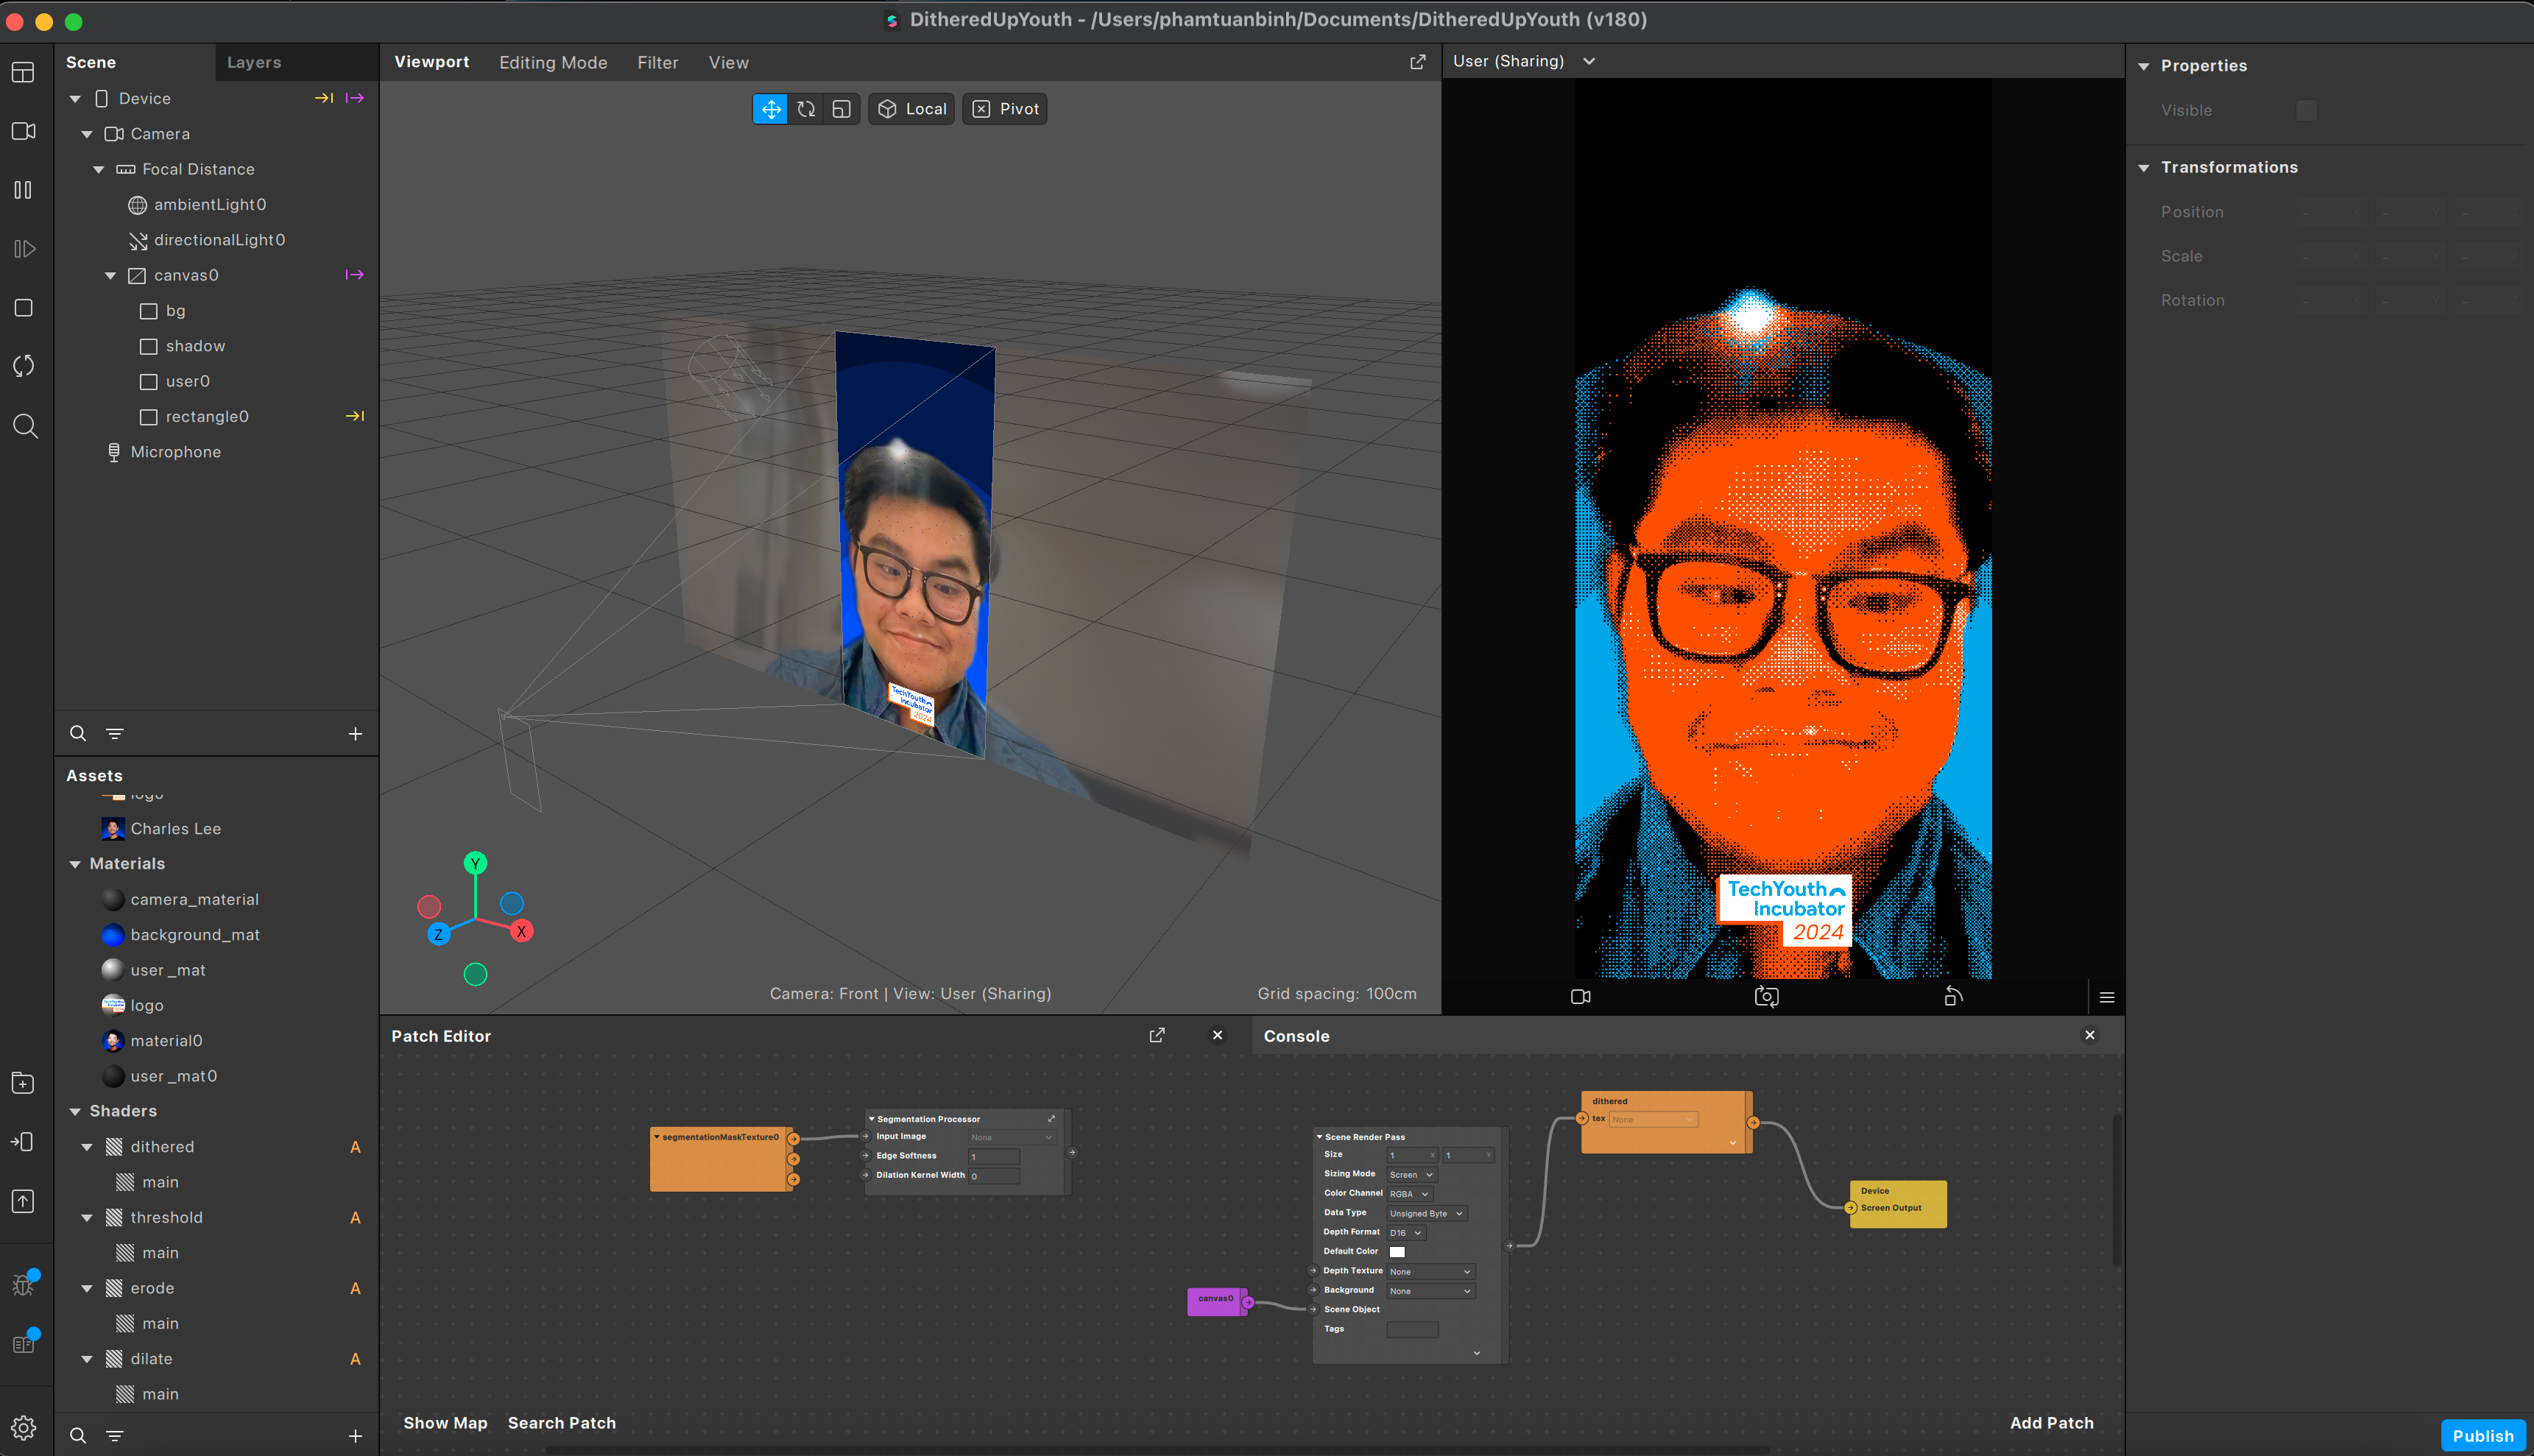
With Patch Editor: Patch Editor is a fancy word for Node-based Programming. This would be very familiar to 3D artists who have already used node editors in Blender. The behavior is the same, you can write your own render passes and your own shaders, all connected with nodes.
With Scripting: In addition to Patch Editor, you can also use JavaScript or TypeScript to build experience in Spark. This has even more versatility and would be familiar to developers.
Implementing TechYouth Dithered
As mentioned in Part 1, there are 3 steps in generating a TechYouth Dithered image:
Remove the background.
Change the background.
Dither It.
1. Remove Background w/ Image Segmentation

For this step, we shall use Render Passes in Patch Editor. The principle here is simple, we are going to segment the person in our scene to get a mask of the person and the background. The general technology behind this is Image Segmentation.
Fortunately, Meta has already published in-depth guides on this process in Spark:
2. Change Background

Using the guide mentioned in the previous step, we can use Layers in Spark to add background and foreground elements.
The principle of this is masking. You can read more about it here.
3. Dither It
3.1 Materials
To dither the image in Meta Spark, we have to write our own shader. This is because Spark doesn’t support any default dithering render pass.
Writing such a shader is straightforward and have been mentioned in Part 1 of this article. In short, you should read the below materials to get a hang of the mathematical background behind dithering:
After getting a hang of the math, the only hard part is answering “What is a shader”, which will lead you to:
For veterans who have already known GLSL, unfortunately, Spark has their own shading language called Spark Shading Language that you have to use in their program.
3.2 Spark Shading Language (SparkSL)
Spark Shading Language is Meta’s own shading language. It bears many similarities to GLSL, but it has quite some weird difference.
All differences are mentioned in the official SparkSL repository. Some notable differences are:
Vertex Shader and Fragment Shader shares the same file and is implemented in the same main() function.
There are namespaces in SparkSL.
Different array notation.
A different way to get fragment coordinates.
To learn more about Spark, I recommend looking into their repository. Their examples are comprehensive.
3.3 Ordered Dithering Implementation in SparkSL
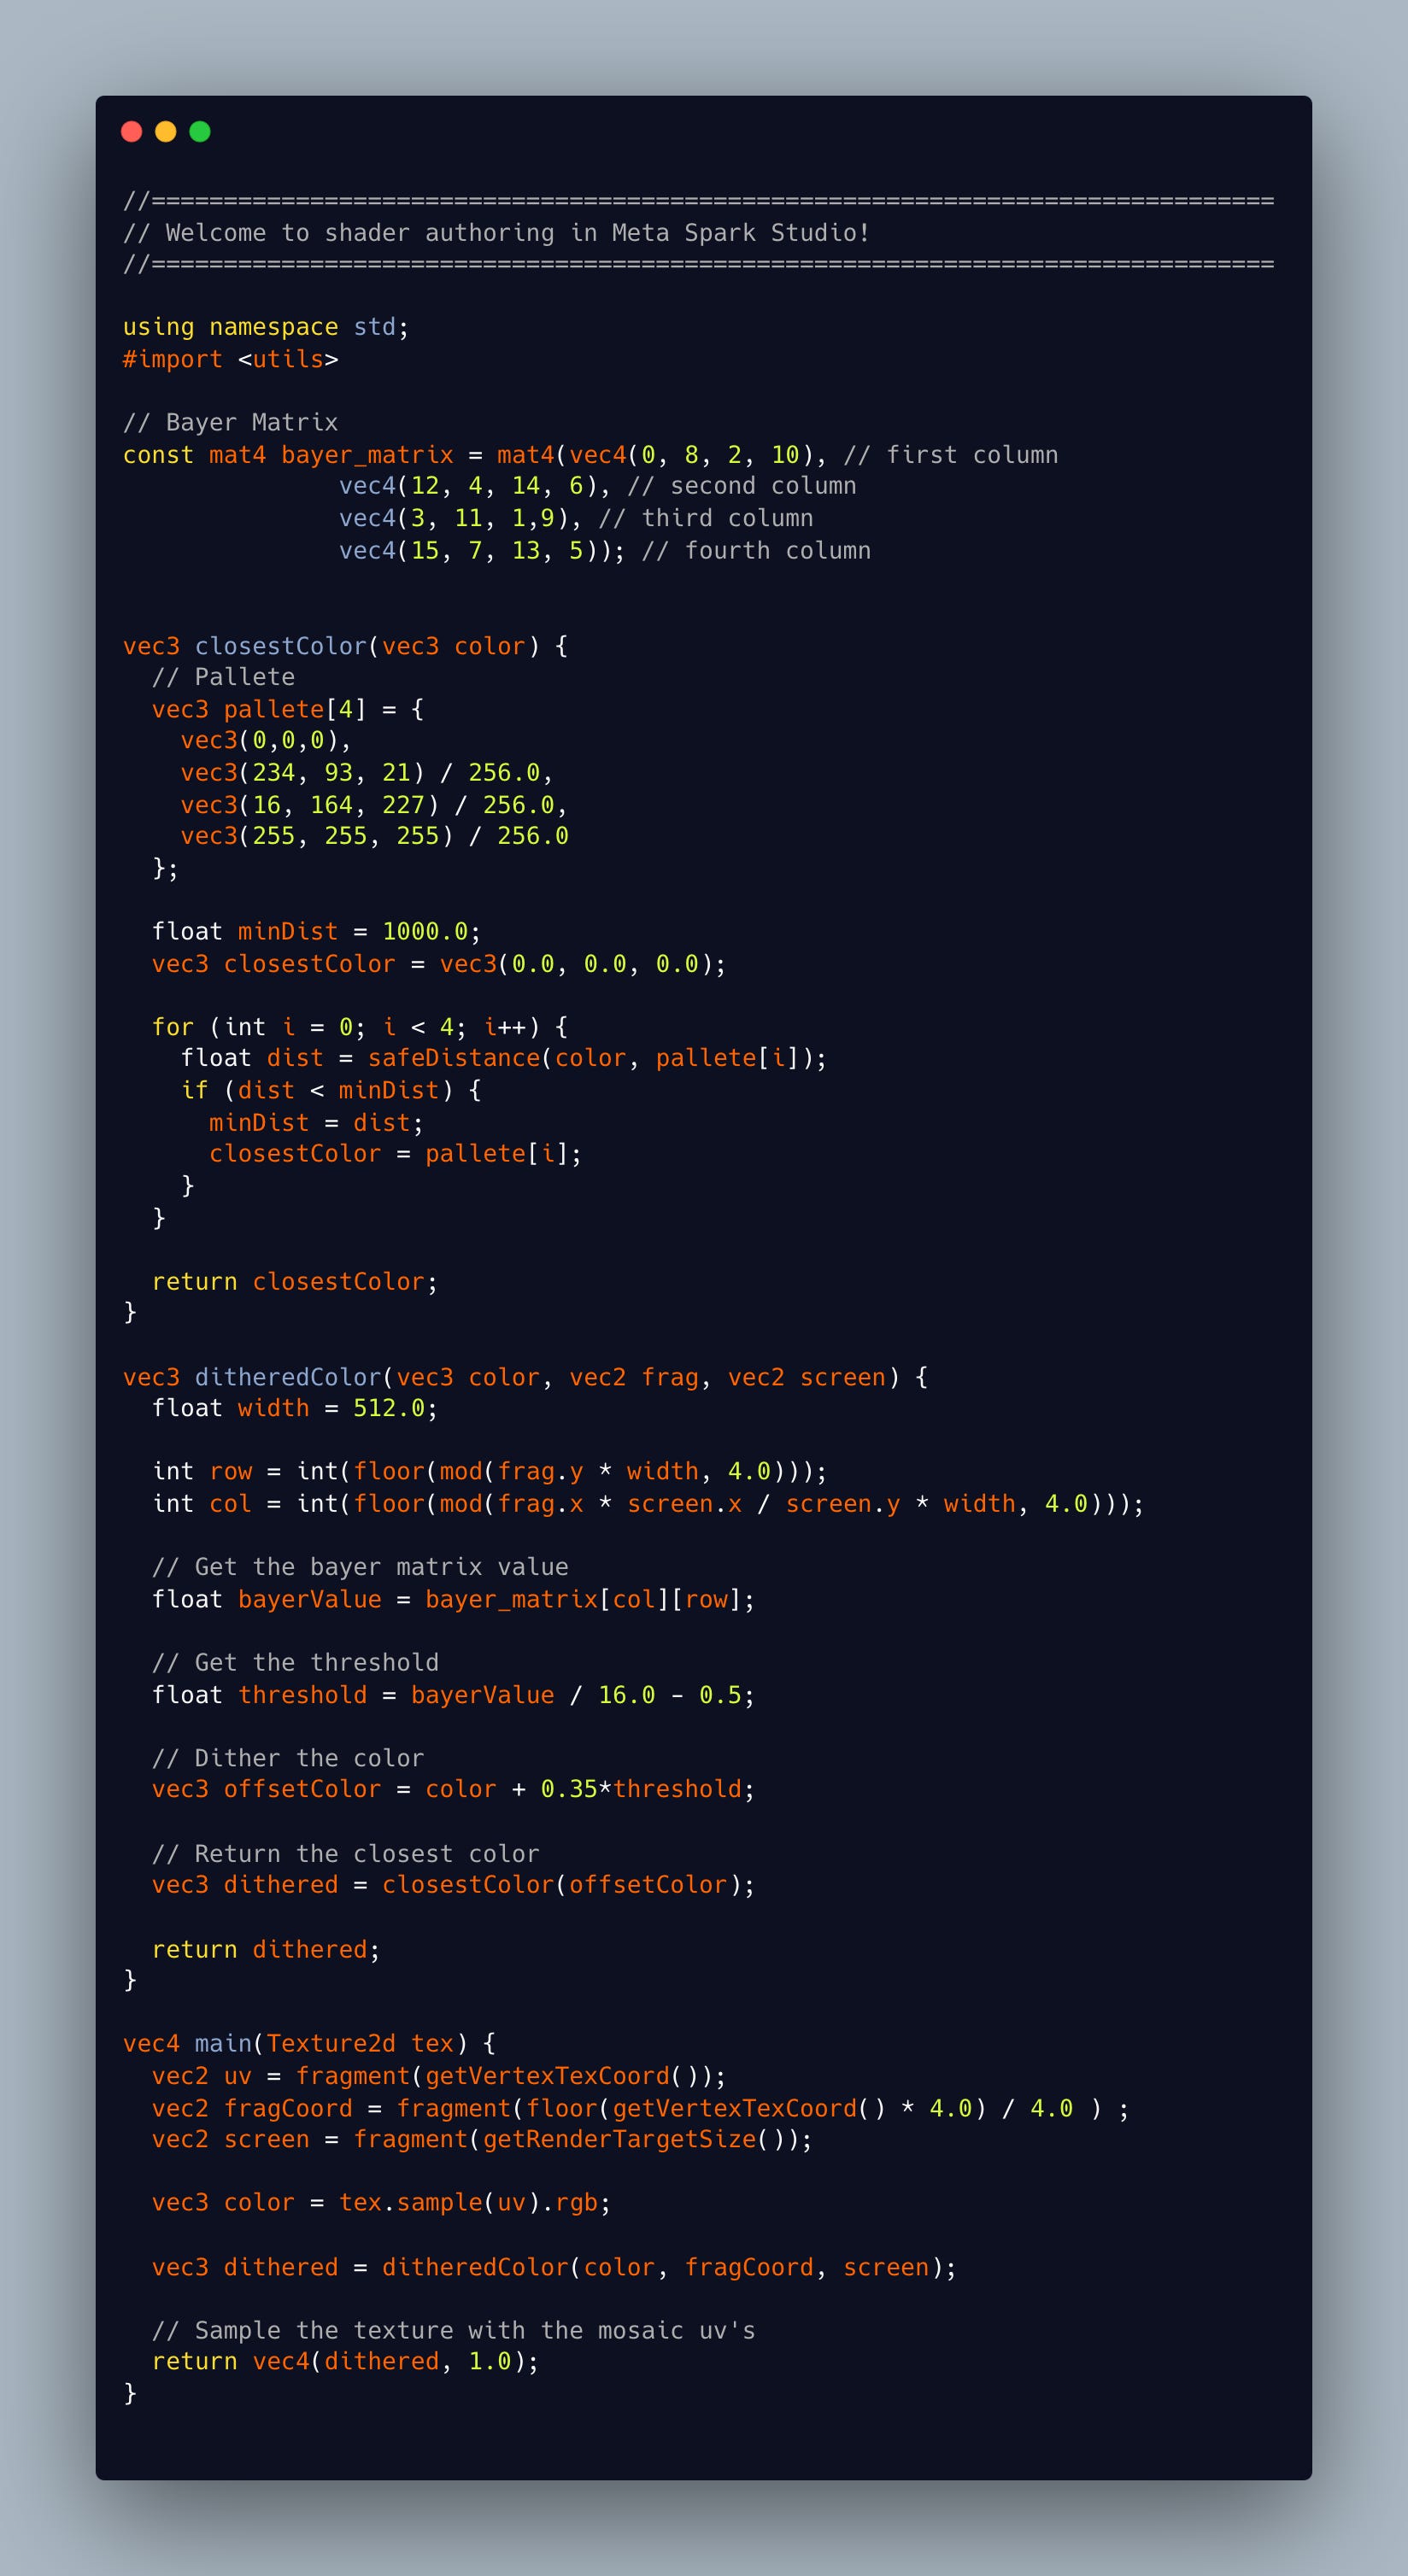
Consolidating all the knowledges we learned from Pt.1 and Pt.2, we have this beautiful unoptimized code.
Sorry for not pasting the code in an inline block. It is a limitation in Substack. If I pasted here, there wouldn’t be syntax highlighting. Comment below if you would like to get the source directly, I can send a codeshare.
Endnote
This article is a long-format article, targeting people who like to go down the rabbit hole. Each orange link I included above is highly recommended if you’re curious. Each section finished means you’re closer to the endless bottom.
If you are here, you are special. We are looking for people just like you at TechYouth Incubator. Ping me on LinkedIn if you’re interested. Or even better, just apply and I’ll ping you.